Let me just out myself right now: I love me some carbs. Like, seriously. I know you reading this at home might be like “yeah man, me too” – but I don’t think you REALLY get it.
I love me some carbs
Without the structure and discipline of bodybuilding, I’d easily be pushing 3 or 400 pounds most likely, even though my body doesn’t gain fat SUPER easily I’d find a way to eat myself to that weight.
So naturally, I love some carb-based recipes as well. And while I’ve been experimenting more in the kitchen with some real recipes of late (more details on those coming later), the bread and butter of my routine (mmm…bread) remains the simple and easy stuff.
WTF is an air fryer?
Full disclosure – I’m hardly an expert with this thing. In fact, this post you’re reading right now is the extent of my knowledge and experience with my air fryer. This is literally the ONLY thing I have ever done with it. Mostly just due to fear, lack of creativity, and laziness.
The air fryer uses heat and air (and a little oil) to fry things – so ostensibly it’s “healthier” although the recipe book that came with it has LOADS of macro-UNfriendly options in it. As with everything, it’s just a tool and it is what you make of it. But it gives you the option to create some tasty, lower-fat versions of things that would typically bust your macros in a hurry.
The air fryer is a countertop appliance that has a removable basket where you put all the goods. Typically the basket is a solid shell with a separate piece that “floats” inside that shell with holes in the bottom to allow for full air circulation. As you might imagine, the more “loaded up” you have the basket, the longer the cooking time usually because the air circulation gets blocked to some extent.
The variables you control are temperature and time, so it’s pretty simple. And with this recipe, we’ll set a temperature and then just micro-manage/babysit the damn thing so the time doesn’t really matter – it’s done when you look at it and say “holy s&%# get in my belly!”
Ok, step by step – let’s do it
This will be painless, promise. Three super easy steps – chop, season, fry. That’s it.
Step 1 – Chop!
I do this in 2 stages because I am OCD to the point of stupidity. You could do just the first step and probably be fine.
I use the mandolin to make quick work of step one. After rinsing the potatoes, I run them through the mandolin to get nice slices of uniform thickness
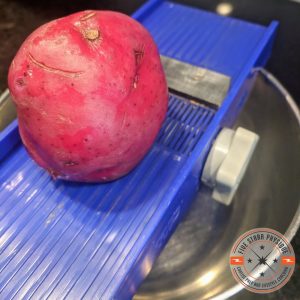
Slice n dice!
Again, Captain OCD surfaces and this is what we get…
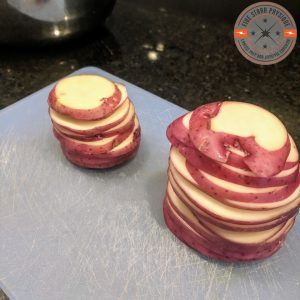
I mean it DOES look pretty!
You COULD just skip ahead to seasoning here, but I like smaller bites so I then quarter these stacks with a sharp knife.
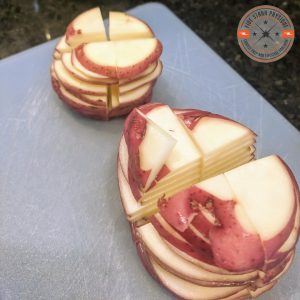
Such uniformity – this makes my soul happy
Step 2 – season!
Now we’ll toss these suckers in a bowl and season them up. I use olive oil (1 teaspoon is sufficient – more will give you a bit more crunch but of course your fat macros will go up a bit also), garlic powder, Trader Joe’s Everyday Seasoning blend and SALT, plenty of it.
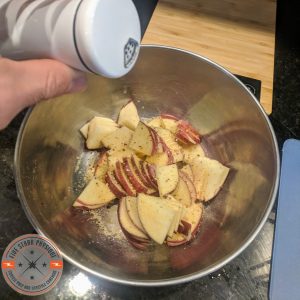
Season and mix!
Don’t be afraid to get your hands dirty here – tossing the bowl by hand will mix everything a bit more thoroughly and you’ll avoid “dud” bites that are lacking in flavor.
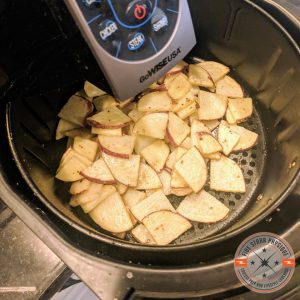
Step 3 – fry!
And just like that we’re done with 2 steps! Now we just fry, which is stupid easy.

In they go!
Toss the mix into the air fryer basket and give it a good shake so things aren’t stacked/piled up excessively. My air fryer has a setting for “chips” which just automatically puts it to 400 degrees for 20 minutes. Either way, that’s what we want, though I got into the habit of giving them some extra time when I was making much larger servings. So I set it for 24 minutes knowing it won’t likely take that long.

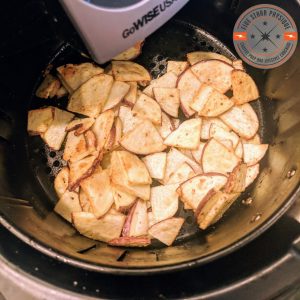
Here’s where we micro-manage the process just a bit. Every 7-8 minutes or so, pull the basket out and stir up the contents with a fork. This ensures you get thorough circulation throughout your entire batch, let’s you see how things are coming along, and I also take the opportunity to add a bit of extra salt as I stir things up. Most air fryers assume you’ll be checking in on things mid-cook and will automatically shut off when you pull the basket out, and resume automatically when you push it back in place.
Getting there!
You see things start to brown a bit, and you can just repeat this process every 6-8 minutes or so, continuing to stir and assess when they look “done” – a nice, crispy, golden brown is what we’re after.
There we go!
And ta da, after about 20 minutes you get a finished product that you can transfer to a plate or bowl and you’re done!
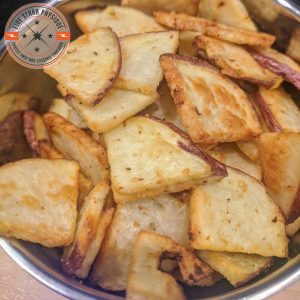
Sooo good!
You can have as-is or alongside some sugar-free ketchup or condiment of your choice.
A note on macros here
For purposes of the photos shown here, I started with an 11 oz portion of potato and ended up with 5 oz cooked – this is entirely due to water loss during the cooking process as the air fryer will dry this stuff out completely. So what do I log? If you pick the wrong answer here, your numbers will be WAY off. A potato serving of 11 oz vs. 5 oz is the difference of about 35g of carbs.
So what matters is the raw, uncooked measurement. Make sure you’re also logging a database entry that references a raw, uncooked potato also. So for an 11 oz serving like this, it should be in the neighborhood of 66g of carbs (about 6g carbs per ounce of potato). The ONLY real downside to this recipe and cooking technique is that it DOES make for a somewhat smaller portion size, so you’ll get in a ton of carbs without necessarily feeling like it – which can be useful if your appetite is lower or if your macro targets are super high.
Bring it on home
The air fryer in my kitchen is still something shrouded in mystery. I sometimes just refer to it as “the potato machine” since, as mentioned above, that’s all I’ve ever used it for. Even so, with how damn good these things are it was absolutely worth the investment!